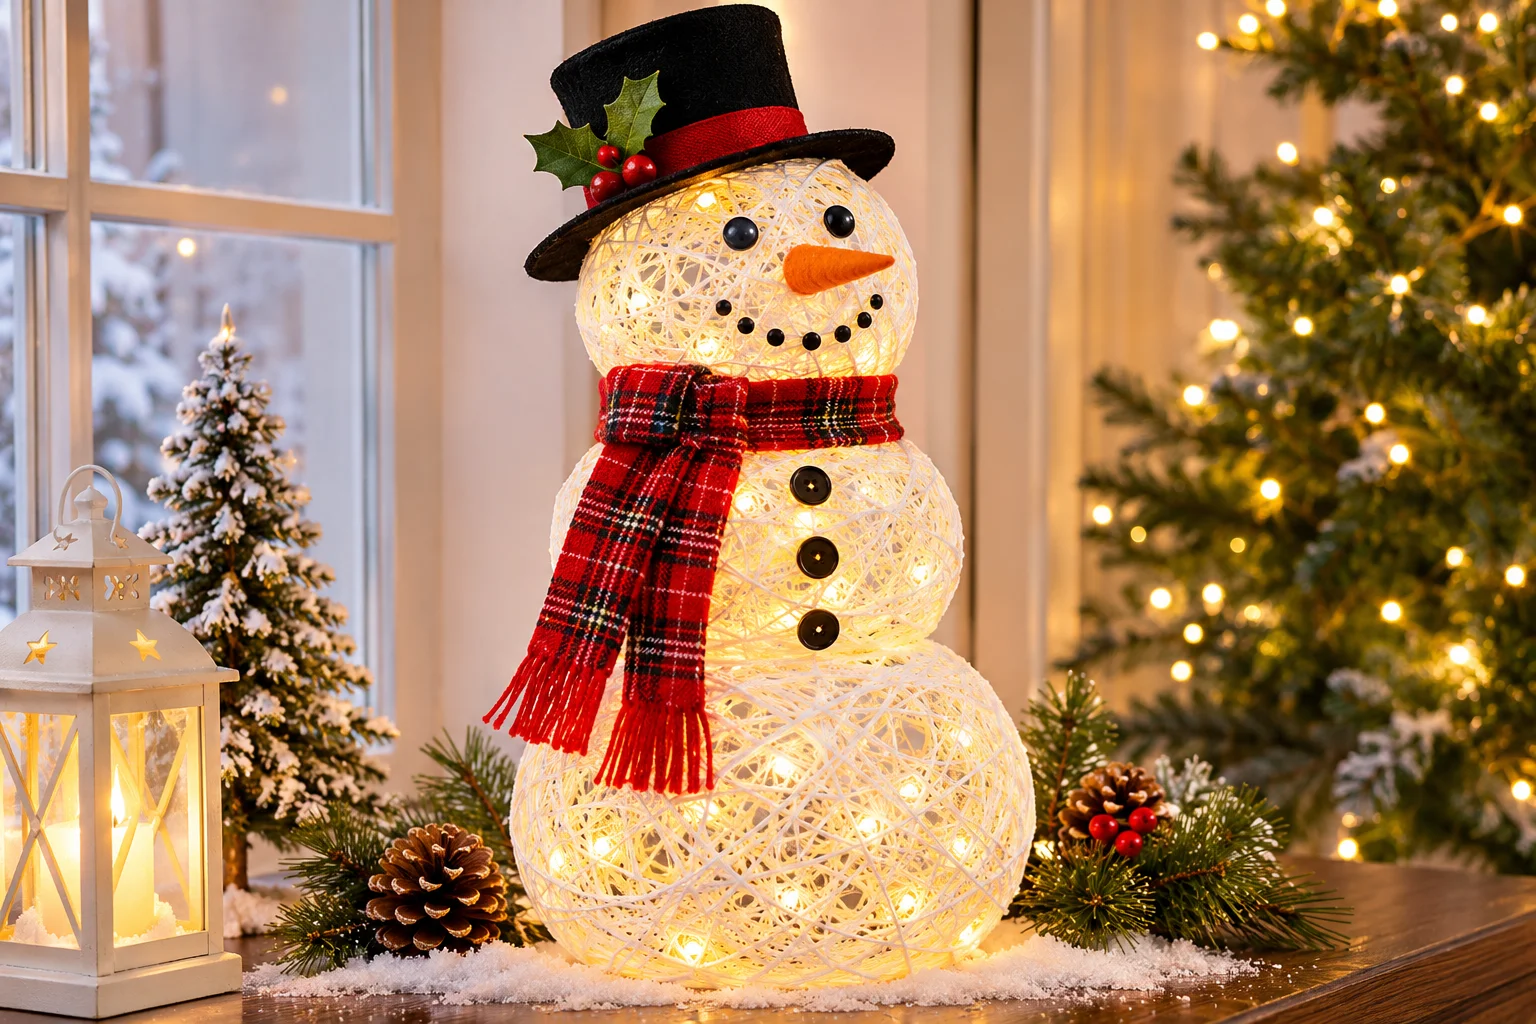
DIY Glowing Yarn Snowman Light: A Magical Winter Decoration
A glowing yarn snowman light is a charming way to bring a little Christmas magic into your home. Made with simple materials like white yarn, balloons, glue, and LED lights, this DIY decoration creates beautiful illuminated snowballs that look especially lovely on a mantel, entryway table, windowsill, or beside your Christmas tree.
The best part? You don’t need expensive supplies or advanced crafting skills. With a little patience, you can create an adorable illuminated snowman that looks delicate, cozy, and wonderfully festive.
In this guide, you’ll learn how to make a DIY glowing yarn snowman light, decorate it with charming winter accessories, and display it as part of your holiday decor.
Quick Takeaways
-
Use white yarn and balloons to create lightweight snowman sections.
-
Coat the yarn with craft glue to help it hold its round shape.
-
Use battery-operated LED fairy lights for a beautiful glow.
-
Add a scarf, buttons, a carrot nose, and a winter hat for personality.
-
Choose warm-white lights for a cozy Christmas atmosphere.
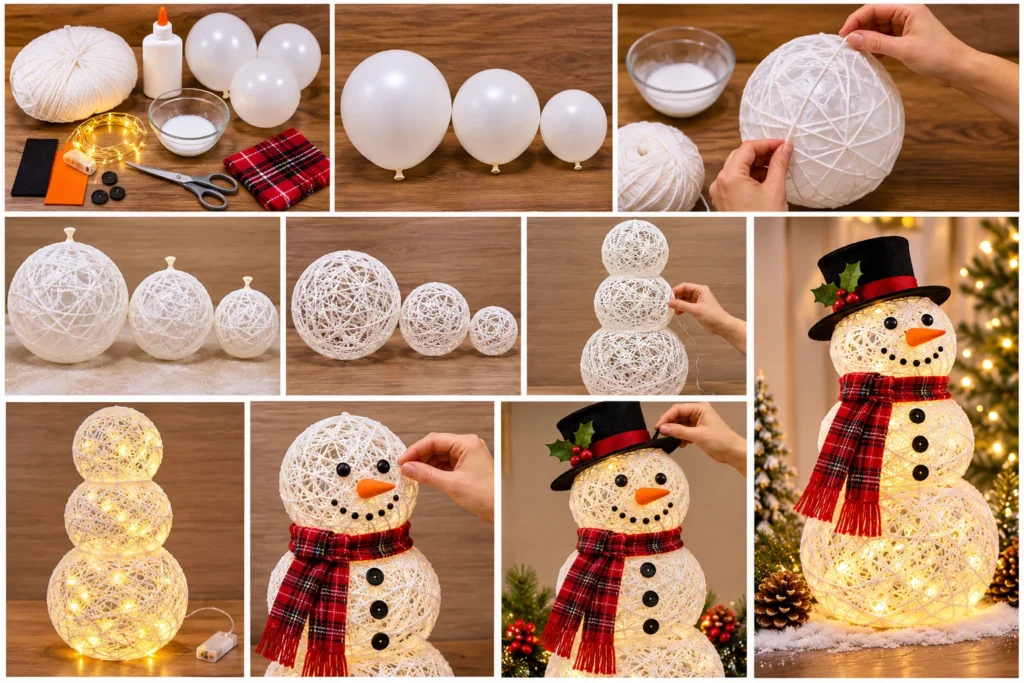
1. Gather the Materials for Your Yarn Snowman Light
Before starting, prepare all your materials. Most of these supplies are inexpensive and can be found at craft stores or around the house.
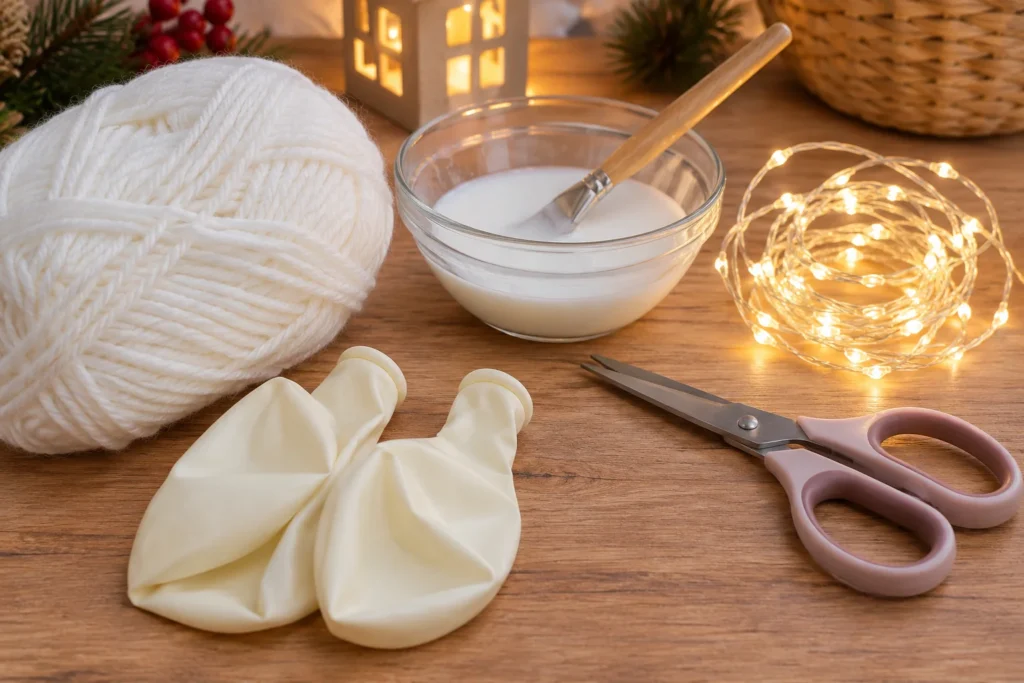
Materials You’ll Need
-
White yarn or cotton string
-
2 or 3 balloons in different sizes
-
White craft glue or PVA glue
-
A little water for thinning the glue if needed
-
A small bowl for mixing
-
Plastic wrap or a protective crafting sheet
-
Battery-operated LED fairy lights
-
Orange felt or cardstock for the nose
-
Black buttons or small black felt circles
-
Ribbon or fabric for a scarf
-
Black felt or a small decorative hat
-
Scissors
Helpful tip: Choose thin or medium-weight white yarn. It creates an attractive web-like appearance that allows the LED lights to shine through.
For safety, use cool-running battery-operated LEDs rather than candles or traditional hot bulbs.
2. Inflate the Balloons to Create the Snowman’s Body
The balloons will act as temporary molds for your snowman’s body.
Inflate two or three balloons depending on the size and design you want.
For a classic three-section snowman, try these approximate sizes:
-
Bottom balloon: 10–12 inches
-
Middle balloon: 8–9 inches
-
Head balloon: 6–7 inches
These measurements are flexible. The important thing is to make each section visibly smaller than the one beneath it.
Tie the balloons securely and arrange them next to each other to check their proportions.
3. Wrap the Balloons With White Yarn
This is the step that gives your snowman its beautiful snowy texture.
First, pour craft glue into a bowl. If the glue is very thick, add a small amount of water and mix until it becomes easier to spread.
Cut several manageable lengths of white yarn.
Dip the yarn into the glue mixture, gently removing excess glue between your fingers. Begin wrapping it around the balloon in different directions.
Continue wrapping until the balloon is covered with a loose network of yarn.
You don’t need to cover every inch. Small openings are important because they allow the light to shine through later.
Tips for a Beautiful Finish
-
Wrap the yarn in multiple directions for a balanced web-like pattern.
-
Avoid creating large uncovered gaps.
-
Don’t wrap so tightly that the balloon loses its shape.
-
Keep the balloon knot accessible so it can be removed later.
Repeat this process for all the balloons.
4. Let the Yarn Dry Completely
Once the balloons are wrapped, place them somewhere safe to dry.
Allow the glue to harden completely. Depending on the glue, humidity, and thickness of the yarn, this may take 12–24 hours or longer.
Avoid rushing this step. If the yarn is still damp, the shape may collapse when you remove the balloon.
Once everything feels firm and dry, carefully pop each balloon with a pin.
Gently pull the deflated balloon out through one of the openings.
You should now have three lightweight, hollow yarn balls.
Crafting note: If any sections feel soft or lose their shape, allow them to dry longer before assembling the snowman.
5. Assemble the Glowing Snowman
Now it’s time to transform the separate yarn balls into a snowman.
Arrange the largest sphere at the bottom, the medium sphere in the middle, and the smallest sphere at the top.
Secure the sections together using small amounts of craft glue or discreetly placed white yarn.
Make sure the snowman stands upright and the sections are balanced.
If the decoration feels unstable, place the bottom section on a small decorative base.
A wooden round, white-painted cardboard circle, or small wooden tray can work beautifully.
6. Add the LED Lights for a Magical Glow
This is where your handmade snowman becomes truly special.
Take a battery-operated LED fairy-light strand and carefully arrange the lights inside the hollow yarn sections.
You can place a few lights inside each ball, allowing the illumination to spread throughout the snowman.
For the most attractive effect:
-
Choose warm-white LEDs for a soft, cozy glow.
-
Use cool-white LEDs for an icy winter appearance.
-
Spread the lights evenly instead of bunching them together.
-
Keep the battery pack accessible for easy switching.
Avoid forcing the lights through tight yarn openings, as this could damage the delicate structure.
Important safety tip: Keep the battery pack outside the snowman or in an accessible, ventilated position. Never use candles, incandescent bulbs, or other heat-producing lights inside the yarn decoration.
7. Decorate Your Snowman With Cute Winter Accessories
Your snowman already has a lovely glowing body, but a few decorative details will make it look even more adorable.
Create a Carrot Nose
Cut a small triangle from orange felt or cardstock.
Roll or fold it slightly to create a carrot-like shape, then attach it to the center of the snowman’s face.
Add Eyes and Buttons
Use small black felt circles, buttons, or craft beads for the eyes.
Add a few more buttons down the front of the middle section.
Make a Cozy Scarf
Cut a narrow strip of red, green, plaid, or tartan fabric.
Wrap it around the snowman’s neck and tie a small knot or bow.
For a traditional Christmas appearance, choose red-and-white fabric or classic red plaid.
Add a Winter Hat
A miniature black felt top hat gives the snowman a classic look.
Alternatively, make a tiny fabric beanie using leftover felt or knitted material.
8. Creative Ways to Display Your Glowing Yarn Snowman
Once your snowman is complete, choose a spot where its gentle glow can be appreciated.
On a Christmas Mantel
Place the snowman among pine garlands, miniature Christmas trees, and warm fairy lights.
Keep some open space around it so the delicate yarn texture remains visible.
On an Entryway Table
Create a welcoming holiday display with your snowman, a small decorative tree, and a festive tray.
A wooden or white surface works particularly well.
Near a Christmas Tree
Place the snowman beside the tree as an additional illuminated decoration.
Choose warm-white lighting throughout the display for a coordinated appearance.
On a Windowsill
A glowing snowman looks especially charming in a window during the evening.
Make sure the decoration is protected from moisture and that the battery pack remains accessible.
9. Budget-Friendly Variations to Try
You can customize this craft without purchasing lots of extra decorations.
If you enjoy making adorable handmade snowman decorations, check out our No-Sew DIY Sock Snowman: Easy Winter Craft for another fun and easy winter DIY project.
Here are a few creative alternatives:
-
Rustic snowman: Use natural jute twine instead of white yarn for a farmhouse-inspired appearance.
-
Elegant snowman: Add a champagne-colored ribbon, pearl accents, and warm-white LEDs.
-
Frosty snowman: Use cool-white lights and a pale blue scarf.
-
Mini snowman: Make smaller yarn balls for a tabletop Christmas village.
-
Snowman family: Create several snowmen in different heights and display them together.
You can also reuse leftover yarn, fabric scraps, and old Christmas ribbons to keep the project affordable.
Common Mistakes to Avoid
Even a simple yarn snowman craft can be frustrating if a few details are overlooked.
1. Using too much glue: Excess glue can fill the openings between yarn strands and make the snowman look less delicate. Apply enough to coat the yarn without creating thick layers.
2. Removing balloons too early: Damp yarn may collapse after the balloon is popped. Always allow the structure to dry completely.
3. Making all the balls the same size: A snowman looks more recognizable when its sections gradually decrease in size.
4. Wrapping the yarn too loosely: Large gaps can weaken the structure. Cross the yarn in several directions to create a supportive network.
5. Using overly bright lights: Very intense lighting can overwhelm the delicate texture. Choose small LED lights with a gentle glow.
6. Hiding the battery pack permanently: You will need access to the switch and batteries. Keep the pack accessible rather than sealing it inside the decoration.
7. Adding too many accessories: Too many colors and embellishments can distract from the beautiful illuminated yarn texture. Keep the styling simple.
Key Pieces to Consider
| Decorative Piece | What to Choose |
|---|---|
| White yarn | Thin or medium-weight cotton or acrylic yarn |
| LED lights | Battery-operated warm-white fairy lights |
| Scarf | Red plaid, knitted fabric, or velvet ribbon |
| Snowman hat | Miniature black felt top hat |
| Base | Small wooden round or white decorative tray |
Frequently Asked Questions
1. What type of yarn is best for making a yarn snowman?
Thin or medium-weight cotton and acrylic yarn work well. White yarn creates a classic snowy appearance, while textured yarn can give the snowman a softer look.
2. Can I make a glowing yarn snowman without balloons?
Yes. You can use round objects as temporary molds, provided they can be removed after the yarn dries. Balloons are particularly convenient because they can be deflated and pulled out through small openings.
3. How long does a yarn snowman take to dry?
Allow approximately 12–24 hours, although thicker glue applications or humid conditions may require additional drying time.
4. What lights should I use inside a yarn snowman?
Use small, battery-operated LED fairy lights. They provide illumination without the heat associated with traditional bulbs.
5. Can I make a large yarn snowman for outdoor Christmas decor?
You can make a larger version, but ordinary yarn and craft glue are not ideal for prolonged outdoor exposure. Keep the decoration indoors or in a dry, sheltered area.
6. How can I make my yarn snowman look more realistic?
Use three graduated spheres, a small carrot nose, black eyes, a traditional scarf, and a miniature hat. A little faux snow around the base can also complete the winter scene.
7. Can I use colored yarn instead of white yarn?
Absolutely. White is traditional, but pale blue, ivory, silver, and even soft pastel yarn can create beautiful variations.
Conclusion
A DIY glowing yarn snowman light is a simple yet beautiful Christmas craft that combines handmade charm with soft festive lighting.
With just a few basic supplies, you can create a unique decoration that adds warmth and personality to your holiday home. Experiment with different scarves, hats, lighting colors, and sizes to make a snowman that reflects your own decorating style.
Gather your yarn and fairy lights, make a little space for crafting, and create a glowing snowman that deserves a special place in your Christmas decorations. Don’t forget to save this idea for your next holiday DIY project!