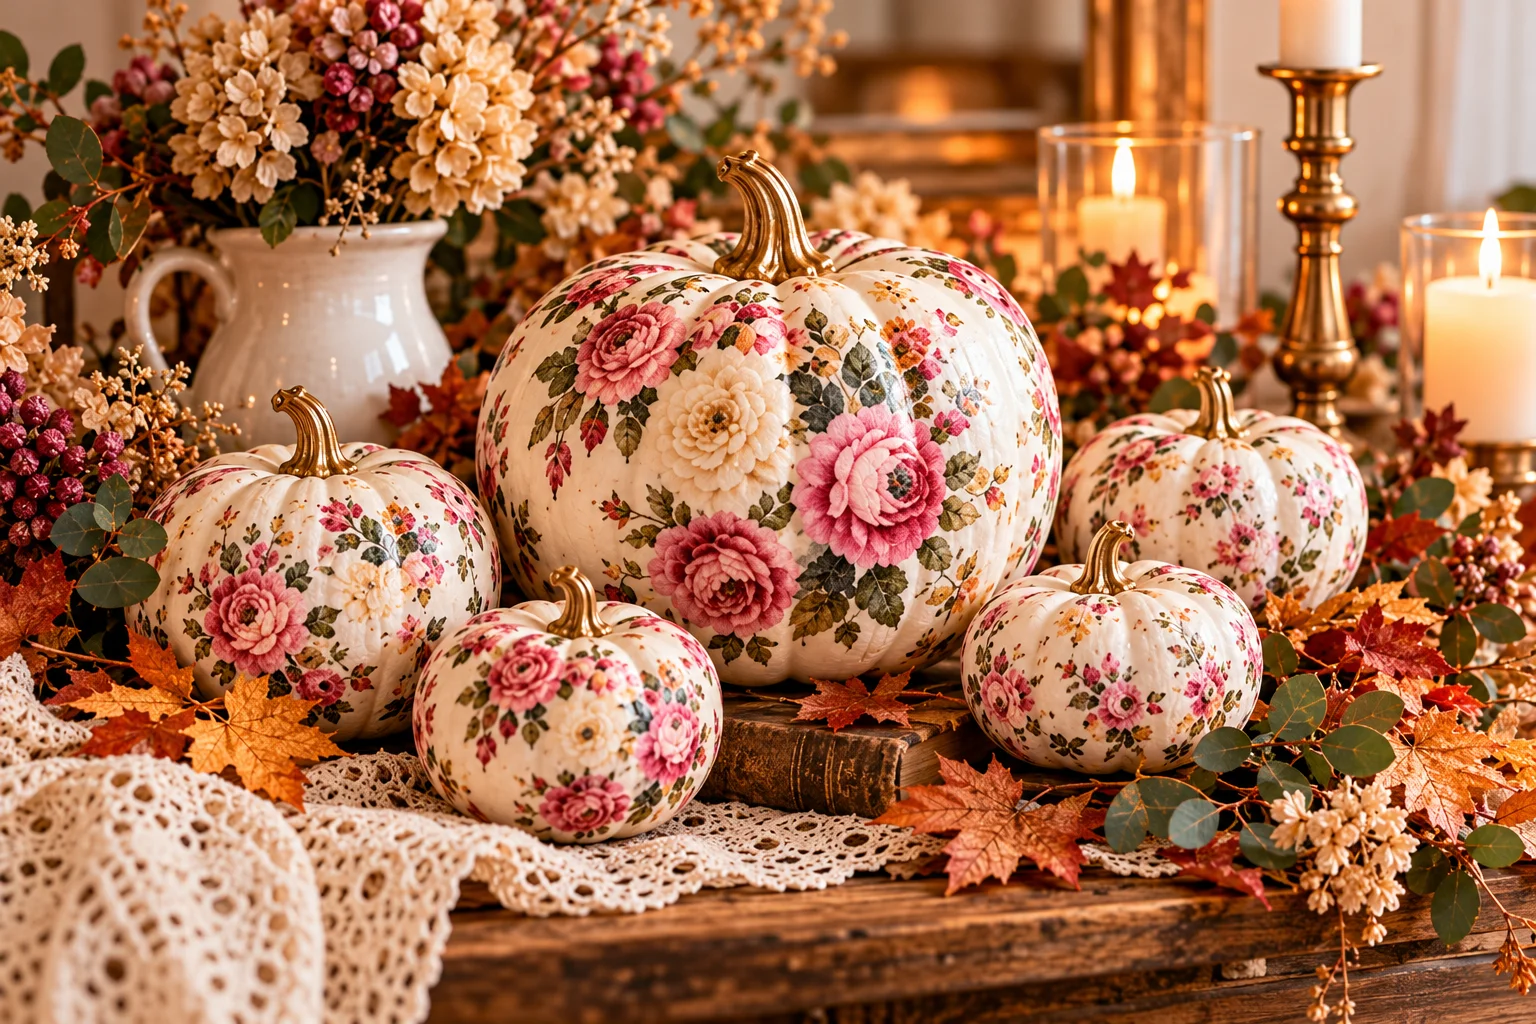
Floral napkin decoupage pumpkins are a lovely way to bring color, pattern, and a handmade touch to your fall decorations. With a few faux pumpkins, decorative paper napkins, and decoupage glue, you can transform simple craft supplies into elegant seasonal accents that look beautiful on a mantel, dining table, or entryway console.
The best part is how versatile this project can be. Delicate roses create a romantic cottage look, vintage botanical prints add timeless charm, and bold autumn flowers bring warmth to a traditional fall display. You can even customize the colors to coordinate with your existing home decor.
Whether you’re planning an afternoon DIY project or searching for affordable fall decorating ideas, these floral napkin decoupage pumpkins offer plenty of inspiration.
Quick Takeaways
- Choose smooth faux pumpkins for easier application and fewer wrinkles.
- Use thin decorative paper napkins with floral patterns for a delicate finish.
- Separate printed napkins into layers before applying the patterned sheet.
- Work in small sections to help prevent tears and wrinkles.
- Display finished pumpkins with candles, greenery, books, or other seasonal accents.
1. Classic Floral Napkin Decoupage Pumpkins
A classic floral decoupage pumpkin is an easy starting point for this craft. The combination of a light pumpkin base and delicate flower patterns creates a fresh, elegant look that works with many decorating styles.
Choose white or cream faux pumpkins and napkins printed with roses, peonies, small wildflowers, or leafy botanical designs. A neutral base allows the colors and details of the floral pattern to stand out.
How to create the look
- Clean the pumpkin with a soft cloth and let it dry completely.
- Separate the printed layer of the napkin from its backing layers.
- Cut or gently tear out the floral motifs you want to use.
- Apply a thin layer of decoupage medium to a small area of the pumpkin.
- Carefully place the napkin piece on the wet surface.
- Smooth it gently with a soft brush, working from the center outward.
- Continue around the pumpkin, overlapping the edges slightly where needed.
- Allow the pumpkin to dry fully before applying a compatible protective topcoat, if desired.
Styling tip: Display two or three floral pumpkins in different sizes on a wooden tray for a simple fall centerpiece.
2. Vintage Rose Decoupage Pumpkins
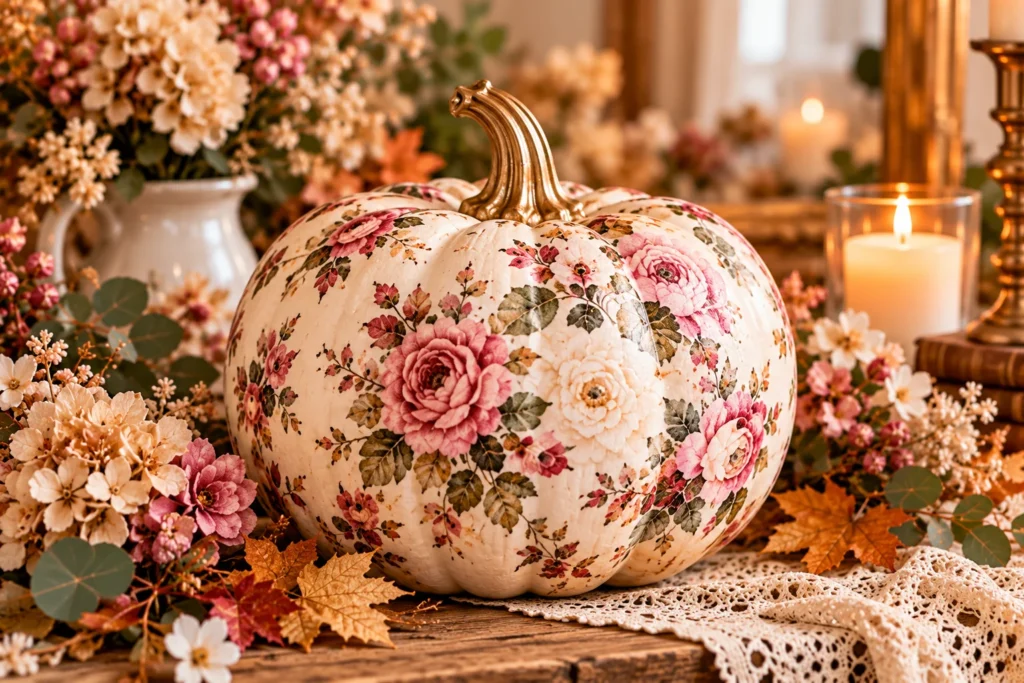
Vintage rose patterns bring a romantic, slightly nostalgic feeling to fall decorating. Soft pink roses, faded greenery, and cream backgrounds pair beautifully with antique-inspired furniture, distressed wood, and neutral textiles.
For this style, look for paper napkins featuring watercolor roses, vintage botanical illustrations, or faded floral prints. Cream or pale blush pumpkins make an attractive foundation.
How to style vintage roses
Apply the floral motifs in small clusters, leaving some of the pumpkin’s original color visible. This creates a lighter appearance and prevents the design from feeling too busy.
Pair the finished pumpkins with an old book, a brass candlestick, or a small ceramic vase filled with dried flowers. A muted palette of blush, cream, sage, and warm brown helps the display feel cohesive.
Budget-friendly tip: Use one pack of decorative napkins to decorate several small pumpkins instead of purchasing separate floral craft materials.
3. Elegant White Pumpkins With Blue Floral Prints
Blue-and-white floral pumpkins offer a refined alternative to traditional orange fall decorations. Their delicate patterns can resemble classic porcelain or vintage botanical china, making them especially attractive in traditional, coastal, and cottage-inspired interiors.
Choose napkins with blue flowers, fine botanical illustrations, or toile-inspired patterns. A white pumpkin base creates a crisp contrast that highlights the design.
Create a blue-and-white display
Place the finished pumpkins on a white console table, a wooden dining table, or a shelf with blue-and-white ceramic accessories.
For a coordinated arrangement, combine several pumpkins with different floral patterns that share similar shades of blue. Keep the surrounding decor simple so the printed designs remain the focal point.
This idea also works well beyond autumn, especially in homes where blue-and-white accessories are already part of the decor.

4. Botanical Greenery and Wildflower Pumpkins
Not every floral design needs to feature large, colorful blooms. Botanical napkins decorated with leaves, ferns, stems, and tiny wildflowers create a natural look that feels understated and timeless.
This style is ideal for farmhouse interiors, Scandinavian-inspired rooms, and homes that favor earthy colors and simple accessories.
How to achieve the look
Start with ivory, sage, or pale gray pumpkins. Apply botanical motifs selectively, allowing plenty of the base color to show through.
Choose napkins featuring olive branches, ferns, eucalyptus-like foliage, or delicate meadow flowers. Pair the finished pumpkins with natural linen, woven baskets, and wooden trays.
Styling tip: Use a mix of botanical patterns rather than repeating the exact same motif on every pumpkin. The coordinated colors will keep the display unified while adding visual interest.

5. Romantic Pink and Pastel Floral Pumpkins
Pastel floral pumpkins are perfect for anyone who prefers a softer approach to autumn decorating. Blush roses, pale peach flowers, lavender accents, and delicate green leaves create a romantic palette that looks beautiful against cream walls and light wood furniture.
Use white or pale pink pumpkins as the base, then add floral napkins featuring watercolor-style blossoms.
Styling ideas
Arrange pastel pumpkins on a bedroom dresser, an entryway table, or a dining room centerpiece. Combine them with soft linen, glass vases, and a few dried stems to reinforce the delicate color palette.
If you want a more polished look, choose flowers with similar background colors rather than mixing many unrelated patterns.
Budget-friendly tip: Decorate a few inexpensive small pumpkins and combine them with plain pumpkins you already own. The contrast makes the floral designs feel more special.
6. Dark and Moody Floral Decoupage Pumpkins
For a more dramatic fall display, choose floral napkins with burgundy roses, deep red blossoms, dark foliage, or muted jewel tones. These patterns create a rich, sophisticated look that suits traditional interiors and modern spaces with darker accents.
Black, charcoal, deep green, or dark plum pumpkins provide a striking background for the floral motifs. If the napkin is very light or translucent, apply a compatible light-colored base beneath the design where necessary to improve visibility.
How to style moody pumpkins
Place the finished pumpkins on a dark wooden tray or a console table with brass accessories. Add a few dried branches or deep-colored flowers for a layered seasonal arrangement.
Keep the surrounding palette restrained. Dark floral designs are often most effective when given room to stand out.
For a more balanced look, mix one dramatic floral pumpkin with two plain pumpkins in cream or muted green.
7. Farmhouse Floral Pumpkins With Neutral Colors
Farmhouse-inspired floral pumpkins combine natural textures with soft, muted colors. Think cream backgrounds, tiny wildflowers, faded greenery, and subtle brown details rather than bright or heavily saturated patterns.
This approach is easy to incorporate into existing fall decor because it works well with wood, linen, wicker, and neutral ceramics.
How to create a farmhouse arrangement
Choose cream or light beige pumpkins and apply small floral motifs rather than covering every surface. Let some of the pumpkin remain plain to preserve the understated look.
Place the finished pumpkins on a reclaimed wood tray or beside a woven basket. Add a folded linen runner, a ceramic vase, or a few dried stems to complete the arrangement.
Styling tip: Vary the heights and sizes of the pumpkins to create a natural-looking display without overcrowding the surface.
8. Floral Decoupage Pumpkins With Gold Accents
A touch of gold can make floral decoupage pumpkins feel more polished and decorative. The metallic finish complements cream backgrounds, blush flowers, and muted greenery without overpowering the botanical design.
You can add gold to the pumpkin stem, apply a thin metallic detail along selected grooves, or use a compatible gold craft medium to highlight small areas.
How to add the finishing touches
First, complete the floral decoupage and allow it to dry fully. Then apply gold paint sparingly to the stem or selected details.
For a cohesive look, pair the pumpkins with brass candleholders, gold-rimmed trays, or simple metallic accessories.
Avoid applying too many decorative finishes at once. A small amount of gold usually provides enough contrast to make the arrangement feel special.
9. Mini Floral Decoupage Pumpkins for Table Decor
Mini pumpkins are especially useful for floral decoupage because they are easy to display in groups and make attractive additions to small spaces. They work beautifully on dining tables, kitchen counters, bookshelves, and entryway consoles.
Their smaller surface area also makes them a practical option if you’re new to decoupage.
Ideas for decorating with mini pumpkins
- Arrange several along the center of a dining table.
- Place one beside each guest’s place setting as a seasonal accent.
- Group them on a wooden tray with dried leaves and small branches.
- Use matching floral patterns for a coordinated look.
- Mix decorated pumpkins with plain white or natural-colored pumpkins.
For a table centerpiece, keep the arrangement low enough that guests can see one another comfortably. Avoid placing delicate paper pumpkins directly beside open flames or hot serving dishes.
Materials Needed for Floral Napkin Decoupage Pumpkins
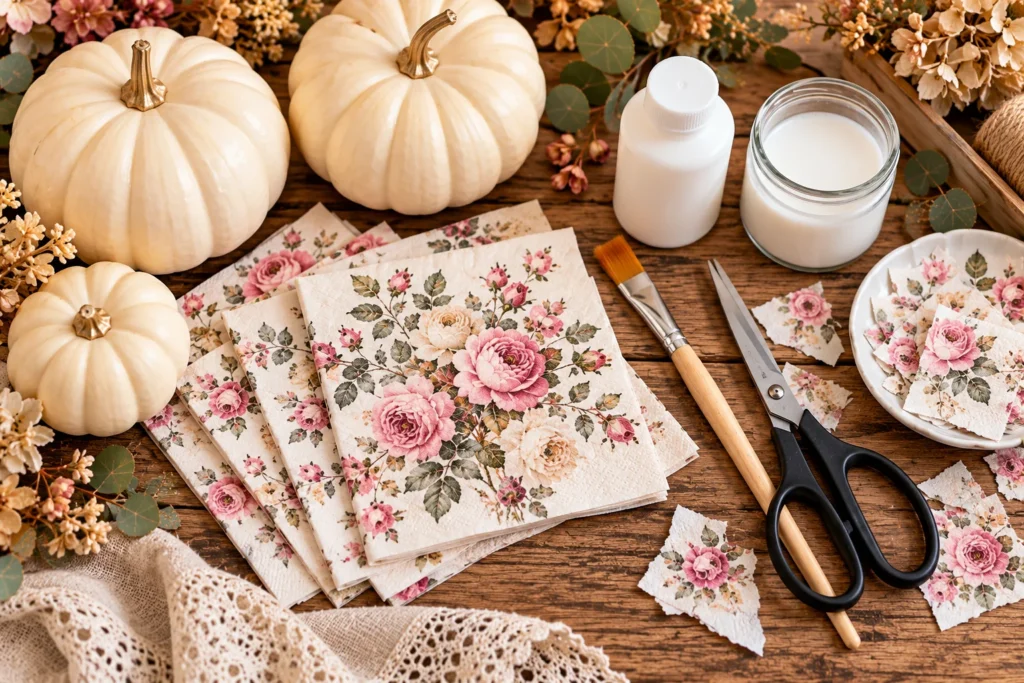
Most of the supplies for this project are easy to find at craft stores or online.
| Material | Purpose |
|---|---|
| Faux pumpkins | Provide a reusable base for the decoration |
| Decorative paper napkins | Add floral or botanical patterns |
| Decoupage medium | Adheres the paper to the pumpkin |
| Soft craft brush | Applies glue and smooths the paper |
| Small scissors | Cut out detailed floral motifs |
| Fine-grit sandpaper | Smooths minor imperfections on suitable surfaces |
| Acrylic paint | Changes the pumpkin’s base color when needed |
| Compatible protective sealer | Helps protect the finished design |
| Protective table covering | Keeps the work surface clean |
Faux pumpkins are often the easiest option because they are lightweight and can be reused. Smooth surfaces are generally easier to decorate than heavily textured ones.
If using real pumpkins, choose firm, dry pumpkins and remember that they are temporary decorations. Moisture, decay, and surface changes can affect how long the finished piece lasts.
Step-by-Step Guide: How to Make Floral Napkin Decoupage Pumpkins
Step 1: Prepare the pumpkin
Wipe the pumpkin with a soft cloth to remove dust and dirt. If you plan to paint it, use a paint suitable for the material and let it dry according to the manufacturer’s instructions.
A smooth, dry surface helps the napkin adhere more evenly.
Step 2: Prepare the napkin
Most decorative paper napkins contain multiple layers. Carefully separate the printed top layer from the plain backing layers.
Cut or gently tear around the floral motifs you want to use. Tearing the edges can help some designs blend more naturally into the base, while scissors are useful for more defined shapes.
Step 3: Apply the decoupage medium
Brush a thin, even layer of decoupage medium onto a small area of the pumpkin.
Avoid coating the entire pumpkin at once, as the adhesive may begin to dry before you position the paper.
Step 4: Position the floral paper
Lay the napkin piece gently onto the coated surface. Use a soft brush to smooth it from the center outward.
Napkins are delicate, so work slowly and avoid pulling or rubbing the paper repeatedly. Small wrinkles may occur around curved surfaces, especially near the pumpkin’s grooves.
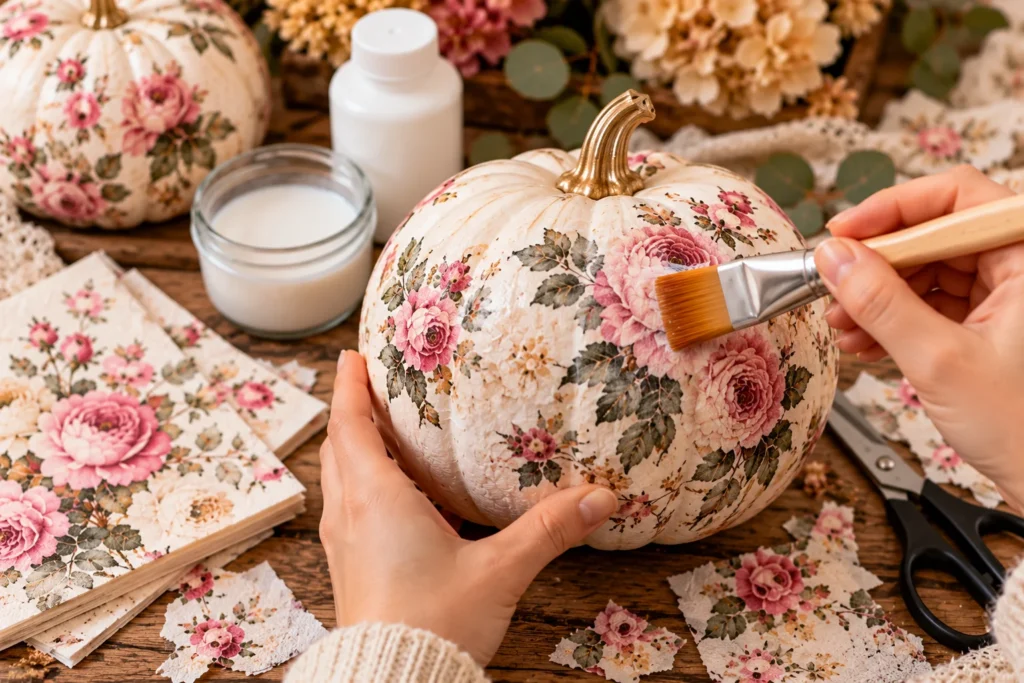
Step 5: Continue around the pumpkin
Add more floral pieces, overlapping the edges slightly where necessary. Rotate the pumpkin as you work, checking that the pattern looks balanced from different angles.
For a lighter design, leave some of the base color visible between flowers and leaves.
Step 6: Allow the pumpkin to dry
Let the adhesive dry completely before handling the pumpkin or adding decorative details.
Follow the drying time and instructions on the product you are using.
Step 7: Seal and finish
If desired, apply a compatible protective topcoat once the decoupage is fully dry. Choose a finish that suits your style, such as matte, satin, or gloss.
Add optional details such as a painted stem, a small ribbon, or subtle metallic accents.
Common Mistakes to Avoid
1. Using napkins with too many thick layers
Thick paper can be harder to smooth around the pumpkin’s curves.
Better approach: Separate the napkin layers and use only the thin printed sheet.
2. Applying too much glue
Excess adhesive can make the paper slippery, wrinkled, or prone to tearing.
Better approach: Apply a thin layer to a small section at a time.
3. Rubbing the paper too aggressively
Decorative napkins can tear easily when wet.
Better approach: Use a soft brush and gentle strokes, working from the center outward.
4. Choosing a highly textured pumpkin
Deep ridges or rough surfaces can make it difficult to apply the paper smoothly.
Better approach: Start with a smooth faux pumpkin, especially if you are new to decoupage.
5. Overcrowding the floral pattern
Covering every inch with flowers can make the pumpkin look visually busy.
Better approach: Leave some of the base visible and repeat a few floral motifs strategically.
6. Sealing before the glue is dry
Applying a topcoat too early can cause the paper to shift or wrinkle.
Better approach: Allow the decoupage to dry fully before applying a compatible sealer.
7. Using the wrong products for the surface
Some paints, glues, and sealers are unsuitable for certain plastics or foam materials.
Better approach: Check the product labels and test the materials on an inconspicuous area first.
Key Pieces to Consider
Smooth faux pumpkins
Choose pumpkins with a relatively smooth surface and a shape that is easy to handle. White, cream, and pale neutral colors are especially versatile for floral designs.
Floral paper napkins
Look for thin napkins with clear botanical prints, watercolor flowers, vintage roses, or seasonal foliage. Smaller motifs can be easier to position around curved surfaces.
Decoupage medium
Select a product suitable for the pumpkin’s material and the type of paper you’re using. A compatible all-in-one decoupage medium can simplify the process.
Soft craft brushes
Soft-bristled brushes help spread adhesive and smooth delicate paper. Keep a clean brush available for gently pressing down edges.
Protective topcoat
A compatible clear finish can help protect the design from handling and dust. Choose a matte finish for a subtle look or gloss for a brighter decorative effect.
Frequently Asked Questions
1. Can I use real pumpkins for floral napkin decoupage?
Yes. Real pumpkins can be decorated, provided the surface is clean and dry. However, they will eventually deteriorate, so faux pumpkins are a better choice for decorations you want to reuse.
2. What type of napkins works best for decoupage pumpkins?
Thin, decorative paper napkins with a printed floral layer work well. Napkins with smaller motifs are often easier to position around curved surfaces than designs featuring one large image.
3. Do I need to paint the pumpkin white first?
Not always. A white or light-colored pumpkin provides a good base for many floral prints. If your pumpkin is dark or the napkin is translucent, a compatible light base coat may help the design show more clearly.
4. How do I prevent wrinkles in the napkin?
Use a thin layer of adhesive, work in small sections, and smooth the paper gently from the center outward. Some wrinkles may still appear around the grooves, but they can become part of the handmade finish.
5. Can I use Mod Podge for floral napkin decoupage?
A decoupage medium such as Mod Podge can work when it is suitable for the pumpkin’s material and the paper being used. Follow the product instructions for application and drying.
6. How long do floral decoupage pumpkins last?
Faux pumpkins can last for multiple seasons when kept clean, dry, and protected from excessive heat and moisture. Real pumpkins have a shorter lifespan because they naturally deteriorate.
7. Can I decorate pumpkins with floral napkins without cutting out every flower?
Yes. You can use larger pieces of the printed napkin or carefully tear out groups of flowers and leaves. Smaller individual motifs provide more control, while larger pieces can create a continuous floral pattern.
8. How should I display floral decoupage pumpkins?
Display them on mantels, dining tables, bookshelves, entryway consoles, or decorative trays. Keep them away from open flames, excessive moisture, and hot surfaces to help preserve the finish.
Final Thoughts
Floral napkin decoupage pumpkins are an easy way to give simple fall decorations a personalized, artistic finish. From vintage roses and delicate wildflowers to dramatic dark botanicals, the right paper pattern can completely transform an ordinary pumpkin.
Start with a smooth faux pumpkin, choose a floral design that complements your home, and work slowly with thin layers of adhesive. A small collection of handmade pumpkins can add warmth and character to your autumn decor without requiring an elaborate budget.
Save your favorite design ideas, gather a few craft supplies, and create floral decoupage pumpkins that make your home feel beautiful and welcoming this fall.