Fall Leaf Suncatcher Craft for Kids
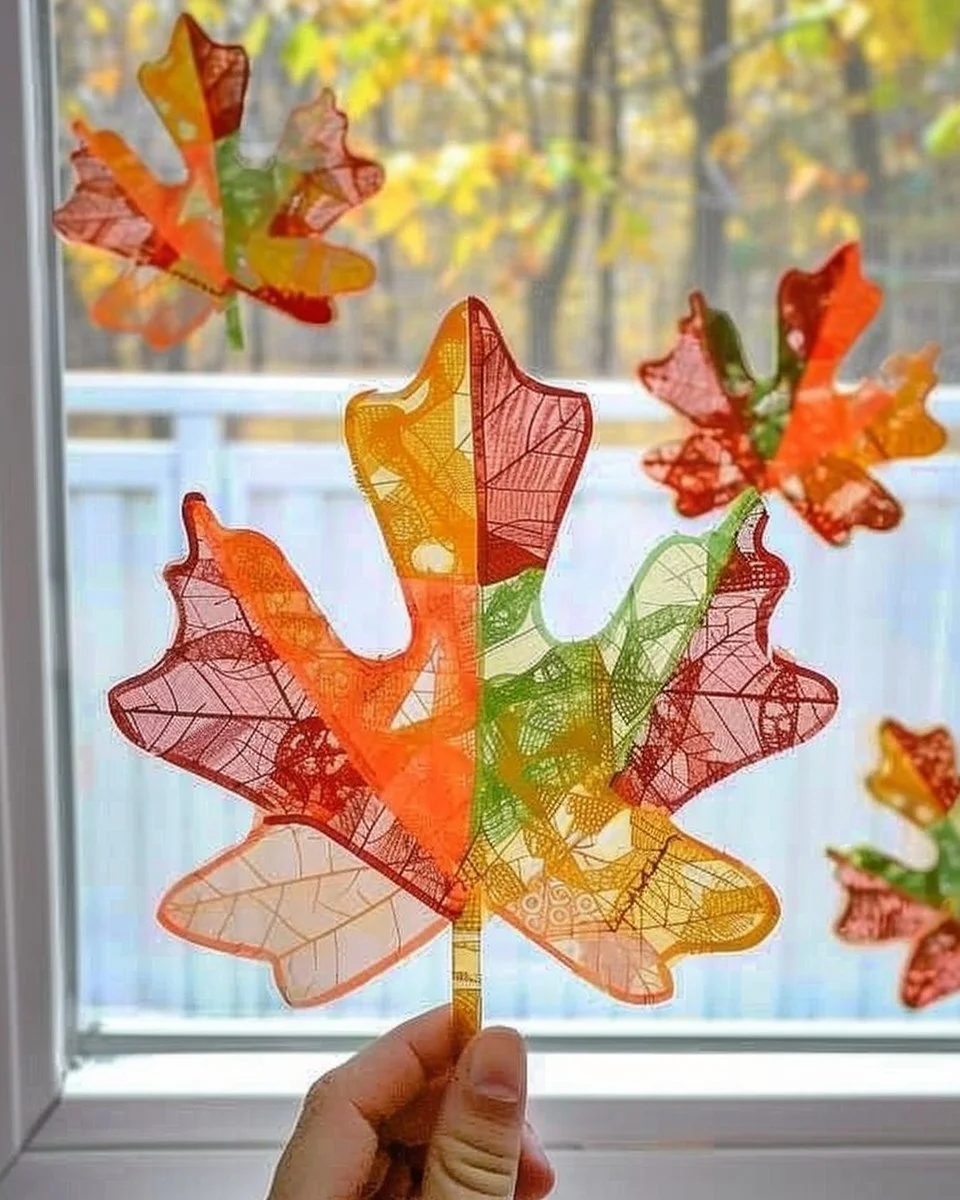
Hey there, crafty friends! Are you ready to embrace the fall vibes? I mean, who doesn’t love the colorful explosion of leaves during this season? One of my fave ways to celebrate autumn with the kiddos is through a super fun and easy Fall Leaf Suncatcher Craft. It’s perfect for brightening up those gloomy October days when the sun refuses to shine but your spirit is still high!
In this article, I’ll guide you through the process of making these delightful suncatchers. You’ll see how easy it is to infuse a bit of nature into your home decor, and trust me—your kids will love it. So grab a cup of cider, and let’s get creative!
What You’ll Need
Before we get rolling, let’s gather our supplies. Here’s a simple list that won’t break the bank (or take forever to find):
- Pressed leaves: Grab some colorful fall leaves—there are no rules here! The more vibrant, the better!
- ** clear contact paper or transparency sheets:** This will help us create that stunning look that catches the light.
- Scissors: For cutting your contact paper or any other materials.
- A craft knife (optional): Great for precise cuts, but make sure adult supervision is around, unless your kid is secretly a knife-wielding Picasso.
- A hole punch (optional): This makes hanging easier if you want to add some flair.
- String or ribbon: To hang your suncatcher once it’s finished.
See? That’s not too complicated, right? Now, let’s get our hands a little messy!
How to Make Your Fall Leaf Suncatcher
Step 1: Collect Your Leaves
Okay, so this is the fun part! Take a walk outside and collect some leaves with your little ones. FYI, the best leaves are the ones that are slightly flat and dry—think about how you’d feel if you tried to suncatch a soggy leaf (not pretty).
Remember to steer clear of snatching leaves off trees—you don’t want the neighbors thinking you’re a leaf thief.
Step 2: Press Your Leaves
Once you’ve gathered your autumn treasures, it’s time to press them. You can either:
- Place them between the pages of a heavy book or magazine for a couple of days.
- Use a microwave (with adult supervision!) to quick-press them: sandwich the leaves between two pieces of parchment paper and zap them for 10-15 seconds. This can get a bit tricky, so keep an eye on it.
Pressed leaves look so much better than fresh ones, so don’t skip this step!
Step 3: Cut the Contact Paper
Now that your leaves are ready to shine, let’s work on the base for our suncatchers. Grab that clear contact paper (or transparency sheets) and cut two large rectangles. Make sure these are big enough for the leaves you want to showcase, but not so huge that they can obstruct the window entirely (we aren’t building an art fortress here).
Step 4: Assemble Your Suncatcher
Now comes the moment of truth! Here’s how to put it all together:
- Peel Off the Backing: Take one piece of contact paper (sticky side up) and lay it down on a flat surface.
- Arrange Your Leaves: Place your flattened leaves on the sticky side, arranging them however your heart desires. Get funky and let the kids have some creative control—no two suncatchers need to look the same!
- Seal It Up: Once you’re happy with the leaf arrangement, carefully place the second piece of contact paper over the top. Make sure to smooth it out to avoid any awkward air bubbles—nobody likes a lumpy suncatcher!
- Trim the Edges: Grab your scissors and cut around the edges of your suncatcher, leaving a small border so the leaves are still held secure.
Step 5: Display Your Masterpiece
This is the part where you can really let your imagination run wild! Use a hole punch to create a top hole, then string some twine or ribbon through it. Find a window that gets lots of sunlight and hang it up. Watch as your vibrant leaves transform your space into a cozy autumn oasis!
Pro Tip: If you want to go a step further, hang a few of these together at different lengths for a delightful window display. It’s like a bouncy castle but for leaves!
Tips for Success
Here are a few nuggets of wisdom I’ve picked up through trial and error (mostly error) that could save you some headaches:
- Choose your leaves wisely: Not all leaves are created equally. Some will lose their color and wrinkles when pressed, so avoid the sad, dried-out ones.
- Make extras: While crafting, you might as well make a few more! They make great gifts for grandparents or neighbors who are not yet on the “leaf thief” list.
- Get creative: While this craft is leaf-centric, add other items like dried flowers or even small twigs to enhance the natural look. The sky’s the limit!
Why Suncatchers Are So Great
Ever wondered why suncatchers have such a magical effect? It’s like bringing a little piece of the outdoors into your home, and honestly, who wouldn’t want that?
- Pretty and Functional: They transform ordinary windows into mini works of art, diffusing colorful beams of light.
- Fun and Educational: This project is a great opportunity to teach kids about nature and inspire creativity. You can even have a discussion about different types of trees since kids may think all leaves come from the same boring tree… little do they know!
- Quality Bonding Time: It’s a perfect way to spend an afternoon. You chat, create, and maybe enforce a few eye-rolling puns. “Why couldn’t the bicycle stand up by itself? Because it was two-tired!”
Conclusion
And there you have it! Easy peasy, right? A fun Fall Leaf Suncatcher Craft that not only beautifies your space but also brings a bit of fall magic indoors. So, the next time you’re feeling the autumn chill, cozy up with this craft, and enjoy a few giggles and some quality time with your kids.
So, what do you think? Are you ready to give it a shot and add a splash of autumn color to your windows? I’d love to hear your thoughts or see your creations! Let’s keep those creative juices flowing—after all, who says you can’t be a “leaf” artist?