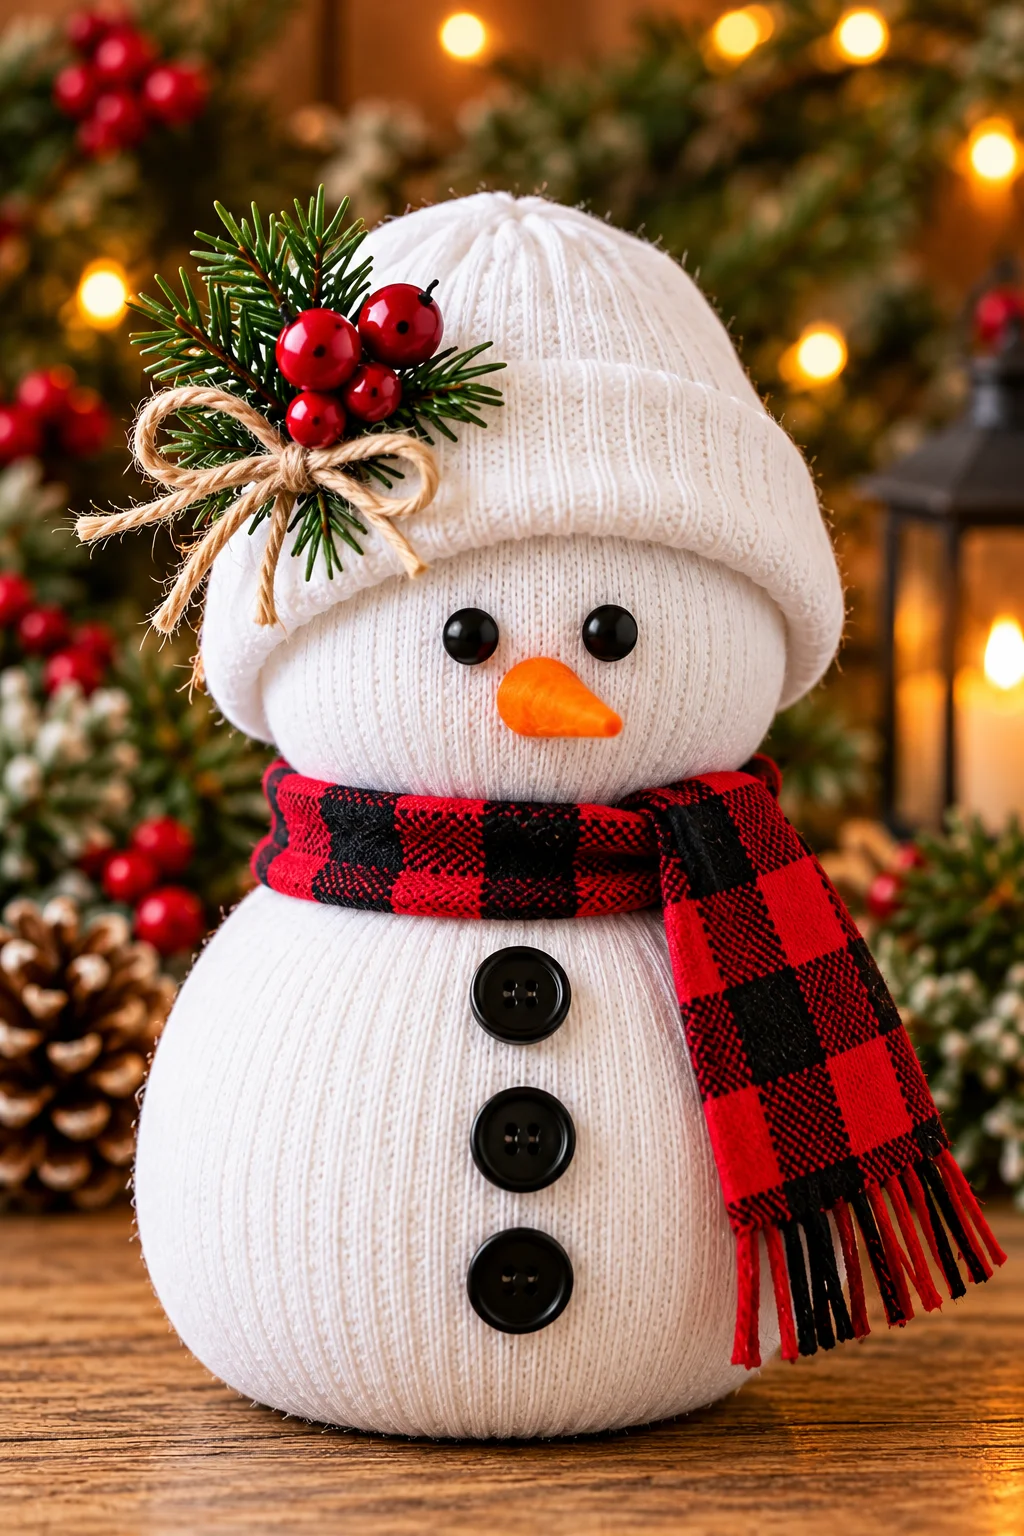
A no-sew sock snowman is an easy, budget-friendly winter craft made with a white sock, rice, rubber bands, and a few simple decorations. It’s perfect for Christmas decorating, cozy farmhouse displays, kids’ craft afternoons with adult supervision, and handmade holiday gifts.
Quick Takeaways
- No sewing required: Use a white sock, rice, and rubber bands to create the snowman’s shape.
- Affordable materials: Most supplies are inexpensive craft or household items.
- Personalize the design: Add a fabric scarf, buttons, a knitted-style hat, or miniature greenery.
- Perfect for holiday decorating: Display your snowman on a mantel, shelf, entryway table, or Christmas centerpiece.
- Make it kid-friendly: Replace small buttons and beads with larger felt decorations when crafting with young children.
Materials You Will Need
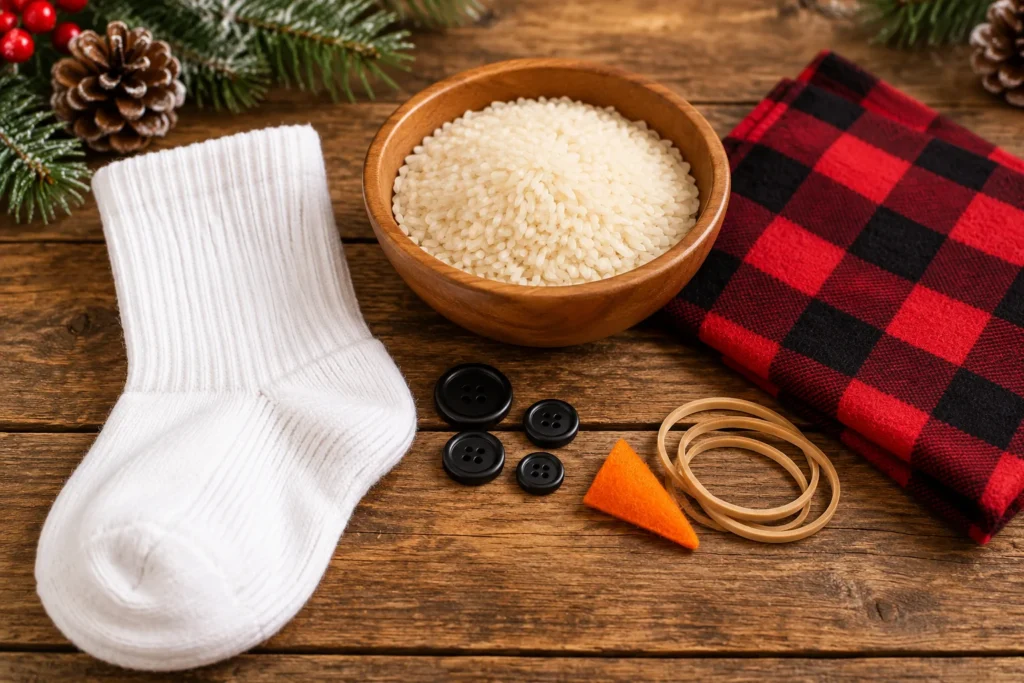
Before you begin, gather the following supplies:
- One clean white crew sock or tube sock
- Approximately 2–3 cups of uncooked rice, depending on the sock size
- Small rubber bands or strong string
- Black buttons or craft eyes
- An orange felt triangle or small piece of orange craft foam for the nose
- A strip of red plaid fabric or ribbon for the scarf
- A second sock or fabric scrap for the hat
- Hot glue or suitable craft glue
- Optional greenery, twine, and small decorative berries
Safety note: Adult supervision is recommended when using hot glue or small decorations. Keep uncooked rice and small craft components away from young children who might put them in their mouths.
How to Make a No-Sew DIY Sock Snowman
Step 1: Prepare the White Sock
Choose a clean, white sock with enough stretch to hold the filling. A ribbed cotton sock works especially well because its texture resembles a knitted snowman’s body.
Turn the sock upright with the toe at the bottom. This section will form the base of your snowman.
Step 2: Fill the Sock with Rice
Carefully pour rice into the sock, using a funnel or a rolled piece of paper to make filling easier.
Fill the lower portion generously to create a rounded body. Gently tap the sock against the table to settle the rice and remove large air pockets.
Avoid overfilling the sock, as you will need enough fabric at the top to close it securely.
Step 3: Shape the Snowman’s Body
Once the sock is filled, use a rubber band or strong string to close the opening securely.
Wrap another rubber band around the middle of the filled sock to separate the larger bottom section from the smaller head. Adjust the filling gently until both sections look rounded.
The lower section should be slightly larger than the upper section, creating the classic two-ball snowman silhouette.
Step 4: Create the Snowman’s Head
Adjust the rice until the upper section is round and balanced. If necessary, add or remove a little filling before securing the top.
Fold the excess sock fabric downward over the head to create a simple winter hat. Alternatively, use a contrasting sock or a piece of soft fabric to make a more colorful hat.
Make sure the base is flat enough for the snowman to stand upright.
Step 5: Add the Face
Attach two black craft eyes near the upper part of the head. Add a small orange felt triangle beneath them to create the nose.
For a classic snowman expression, keep the eyes evenly spaced and position the nose slightly below the center of the face.
You can also add a smiling mouth using small pieces of felt. For a safer option around young children, use larger felt shapes instead of tiny beads or buttons.
Step 6: Decorate the Body with Buttons
Glue two or three black buttons vertically down the front of the snowman’s body.
Keep the buttons evenly spaced to create a neat, traditional snowman design. If you prefer a softer look, substitute small felt circles or fabric patches.
Allow the adhesive to dry fully before moving the snowman.
Step 7: Make a Cozy Scarf
Cut a narrow strip of red plaid fabric, fleece, or ribbon. Wrap it around the snowman’s neck and tie it loosely at the front or side.
A red-and-black buffalo-check pattern creates a rustic farmhouse appearance, while neutral beige fabric gives the snowman a softer, Scandinavian-inspired look.
Trim the ends neatly or add a few short fringes for a finished appearance.
Step 8: Add the Finishing Touches
Give your snowman a personal touch with small seasonal decorations.
Try adding a sprig of faux evergreen, miniature red berries, a twine bow, or a fabric patch on the hat. Keep the accessories light so the snowman remains balanced.
For a rustic holiday display, pair the finished snowman with pinecones, evergreen branches, and warm fairy lights.

Creative Ways to Style Your Sock Snowman
Farmhouse Christmas Decor
Place your snowman on a wooden tray with pinecones, faux evergreen branches, and a small lantern. Choose natural fabrics, muted colors, and rustic accessories for a cozy farmhouse display.
Minimalist Winter Decor
Use a plain white sock, a neutral scarf, and simple black buttons. Display the snowman on a white shelf or a wooden side table for a clean winter look.
Festive Red-and-Black Decor
Choose a buffalo-check scarf, a matching fabric hat, and small evergreen accents. This combination works beautifully with traditional Christmas decorations.
Snowman Family Display
Make three snowmen in different sizes and arrange them together. Give each one a different scarf or hat to create a charming family display.
Common Mistakes to Avoid
1. Using Too Much Rice
Overfilling the sock can make it difficult to shape the head and body. Add rice gradually and leave enough fabric to close the top securely.
2. Making the Base Too Narrow
A narrow base can cause the snowman to tip over. Shape the bottom into a broad, rounded section and adjust the filling until it sits flat.
3. Placing the Head Too Low
If the head is too small or the neck is too wide, the snowman may lose its recognizable shape. Use a rubber band to define the neck and adjust the proportions before adding decorations.
4. Using Heavy Decorations
Large accessories can pull the snowman out of shape. Choose lightweight fabric, felt, and small decorative pieces.
5. Rushing the Glue
Moving the snowman before the glue dries can cause buttons and other decorations to fall off. Follow the adhesive manufacturer’s instructions and allow everything to set completely.
Frequently Asked Questions
Can I make a sock snowman without rice?
Yes. Polyester fiberfill or other suitable craft stuffing can work. However, rice adds weight and helps the snowman stand upright.
What kind of sock works best?
A clean white crew sock or tube sock works well. Ribbed cotton socks create a cozy knitted appearance, while thicker socks can produce a fuller shape.
How long does it take to make a sock snowman?
Most simple designs can be assembled in approximately 20–40 minutes, depending on the size and the number of decorations. Allow additional time for glue to dry.
Can children make this craft?
Yes, with age-appropriate materials and adult supervision. Younger children can help shape the body and choose fabrics, while adults handle hot glue and small components.
How do I keep my sock snowman standing upright?
Use enough rice to create a firm, rounded base, distribute the filling evenly, and shape the bottom so it sits flat. A small, stable display tray can provide extra support.
Can I reuse the snowman next Christmas?
Yes. Store it in a dry, sealed container away from moisture and pests. Check the fabric and filling before displaying it again.
Can I use colored socks?
Absolutely. White is traditional, but cream, gray, or other soft colors can create a unique winter decoration. You can also use contrasting socks for the hat and scarf.
Conclusion
A no-sew DIY sock snowman is a charming way to bring handmade warmth into your home during the winter season. With a few simple supplies and a little creativity, you can create a festive decoration that suits farmhouse, rustic, or minimalist holiday styling.
Make one snowman for a cozy shelf display or create a whole family to decorate your mantel. Save this tutorial for your next Christmas craft afternoon and personalize your snowman with colors and accessories that match your holiday decor.